How to Repurpose Blog Content Into Pinterest Pins
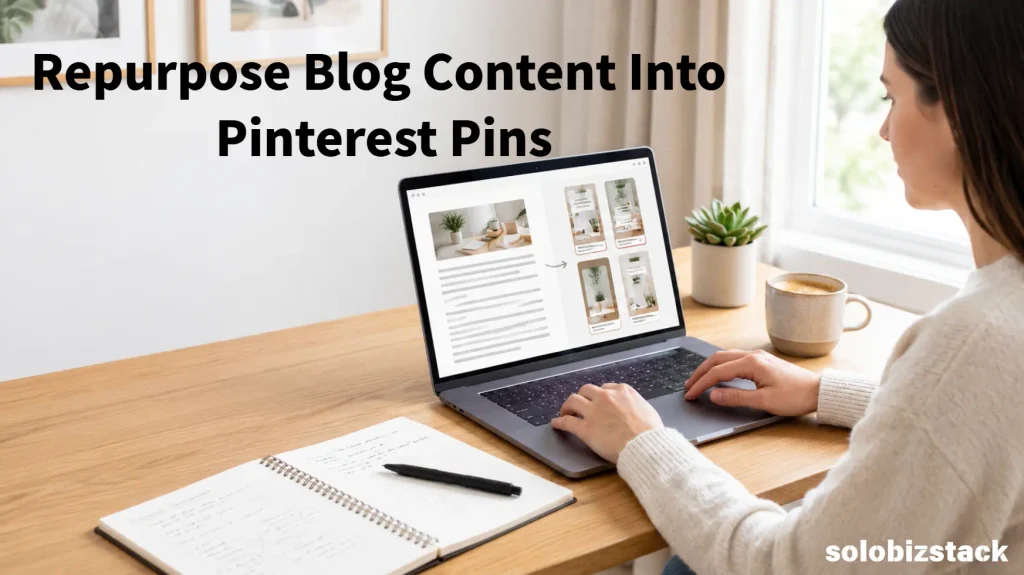
Learning how to repurpose blog content into Pinterest Pins can save you from creating every piece of promotional content from scratch. Instead of writing a blog post, publishing it, and moving on to the next task, you can turn the useful ideas inside that post into several fresh Pins that give people different reasons to visit your website.
This is especially helpful when you run a blog on your own. Writing articles, finding images, handling SEO, and promoting your content already take time. Reusing the work you’ve done makes it easier to keep your Pinterest account active without constantly coming up with completely new ideas.
The trick is to do more than copy your article title onto a template. A good Pin highlights one clear idea, gives the right reader a reason to click, and leads to a page that delivers what the Pin promises.
In this guide, you’ll learn how to choose the right blog posts, extract Pin ideas, design several useful variations in Canva, write Pin titles and descriptions, and review which designs bring people to your site.
Affiliate disclosure: Some links in this article may be affiliate links. If you purchase through one of these links, SoloBizStack may earn a commission at no extra cost to you.
What Does It Mean to Repurpose Blog Content for Pinterest?
Repurposing blog content means using information you’ve already created in a new format.
A detailed blog post may contain a process, a checklist, a comparison, a list of mistakes, or several practical tips. Each of those can become the starting point for a Pinterest Pin.
For example, one blog post about creating a WordPress website could inspire:
- A step-by-step beginner guide.
- A website launch checklist.
- A list of common mistakes to avoid.
- A graphic explaining the most important setup tasks.
- A Pin focused on one specific problem from the article.
All of these Pins can lead to the same article, provided each one accurately represents what’s on that page.
A blog post and a Pin have different jobs. The blog post delivers the detailed answer. The Pin gives someone a reason to discover that answer.
Why Bloggers Should Repurpose Content for Pinterest
Creating fresh content for every platform can become exhausting. Repurposing lets you get more value from the research, examples, and explanations you’ve already prepared.
It also gives your readers more than one way to discover an article. Someone might scroll past a general Pin but notice a checklist that addresses a problem they’re trying to solve.
There are three practical benefits.
You spend less time starting from zero. The main ideas already exist in your article, so you can focus on choosing a useful angle and creating the visual.
You can test different ways to present the same subject. One reader may respond to a direct tutorial headline, while another may prefer a checklist or a problem-focused message. Different creative approaches give you a way to learn what your audience finds useful.
You build a repeatable promotion workflow. Once you have a simple template and a checklist, turning an article into Pins becomes part of your normal publishing routine rather than an extra project you keep postponing.
Repurposing doesn’t guarantee traffic. Results depend on the topic, design, relevance, competition, and how Pinterest users respond. Think of it as a practical way to create more useful entry points to your content, then use the results to improve your approach.
Step 1: Choose the Right Blog Post
Start with articles that already contain useful information and can be communicated visually.
Good candidates include beginner guides, tutorials, checklists, comparisons, resource lists, and step-by-step articles. These formats naturally contain ideas that can be turned into a headline, a short list, or a simple diagram.
An article may be less suitable if it is outdated, too vague, or doesn’t offer a clear benefit to the reader. Before creating Pins for an older post, check that its information is still accurate and that the destination page works properly.
For SoloBizStack, useful candidates include topics such as:
- How to Create Pinterest Pins for Your Blog
- How to Use Pinterest to Drive Traffic to Your Blog
- WordPress website checklists and beginner guides
- AI writing and image creation tutorials
- Blog content planning and keyword research guides
You don’t have to promote every article immediately. Start with a small group of useful, evergreen posts that match your audience and business goals.
Make sure the article is ready first
Before creating a Pin, open the article and check a few things:
- Does it solve a clear problem?
- Does its title accurately describe the content?
- Are the steps, recommendations, and links up to date?
- Is the page easy to read on a phone?
- Does it have a clear next step for the reader?
A beautifully designed Pin won’t help much if it sends visitors to an incomplete or confusing article. Prepare the destination page before spending time on promotion.
Step 2: Find Several Pin Ideas Inside One Article
Once you’ve chosen an article, don’t start designing immediately. Read it again and look for individual ideas that could stand on their own.
You can use a simple process: find the article’s main promise, identify its most useful sections, and turn each suitable section into a distinct Pin concept.
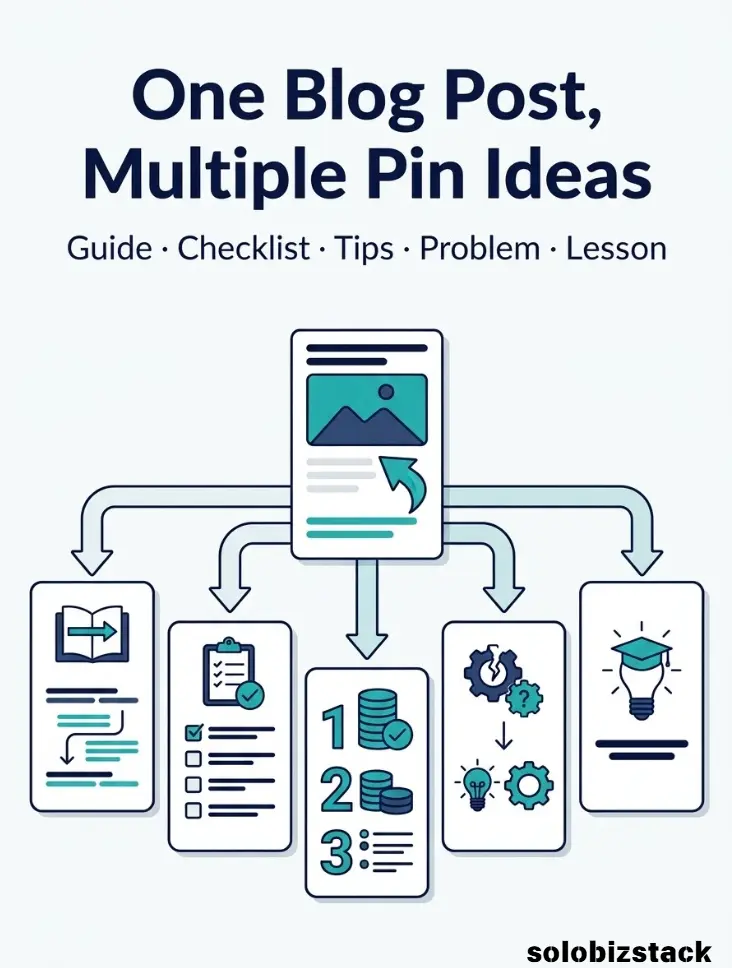
Here are five angles to look for.
Angle 1: The Direct Guide
This is the simplest version. It introduces the article’s main topic clearly.
For an article about creating Pins, the headline might be:
How to Create Pinterest Pins for Your Blog
This works when the reader is actively looking for a tutorial on that subject.
Angle 2: The Checklist
Checklists are useful when the article contains steps readers need to remember.
For example:
Pinterest Pin Checklist for Bloggers
The Pin could show a few short checks, such as headline, vertical design, relevant keywords, destination link, and a final mobile preview. The full article can explain each step in more detail.
Angle 3: The Problem and Solution
Look for a common frustration your article addresses.
For example:
Struggling to Create Pins for Every Blog Post?
This angle speaks directly to a blogger who has limited time and wants a simpler process. The linked article should explain how to reuse existing content rather than promise instant results.
Angle 4: The Numbered List
If your article contains several tips or mistakes, turn the most useful ones into a concise list.
For example:
5 Ways to Turn One Blog Post Into Pinterest Content
Choose points that can be understood quickly. Don’t try to fit an entire article into one graphic.
Angle 5: One Specific Lesson
Sometimes a single section is more useful than a broad summary.
An article about blog content planning might contain a section on building an editorial calendar. That section could inspire a Pin about planning next month’s posts.
A focused Pin can attract people who need that particular answer, even if they aren’t ready to read about the entire subject.
Step 3: Create a Pin Plan Before Opening Canva
A little planning prevents you from designing five versions of the same idea.
Create a small table for each blog post:
| Blog Post | Pin Angle | Suggested Headline |
|---|---|---|
| How to Create Pinterest Pins for Your Blog | Direct guide | How to Create Pinterest Pins for Your Blog |
| Same article | Checklist | Pinterest Pin Checklist for Bloggers |
| Same article | Beginner workflow | Create Your First Blog Pin in Canva |
| Same article | Common problem | Make Blog Pins Without Starting From Scratch |
| Same article | Quick tips | 5 Ways to Make Your Blog Pins Easier to Read |
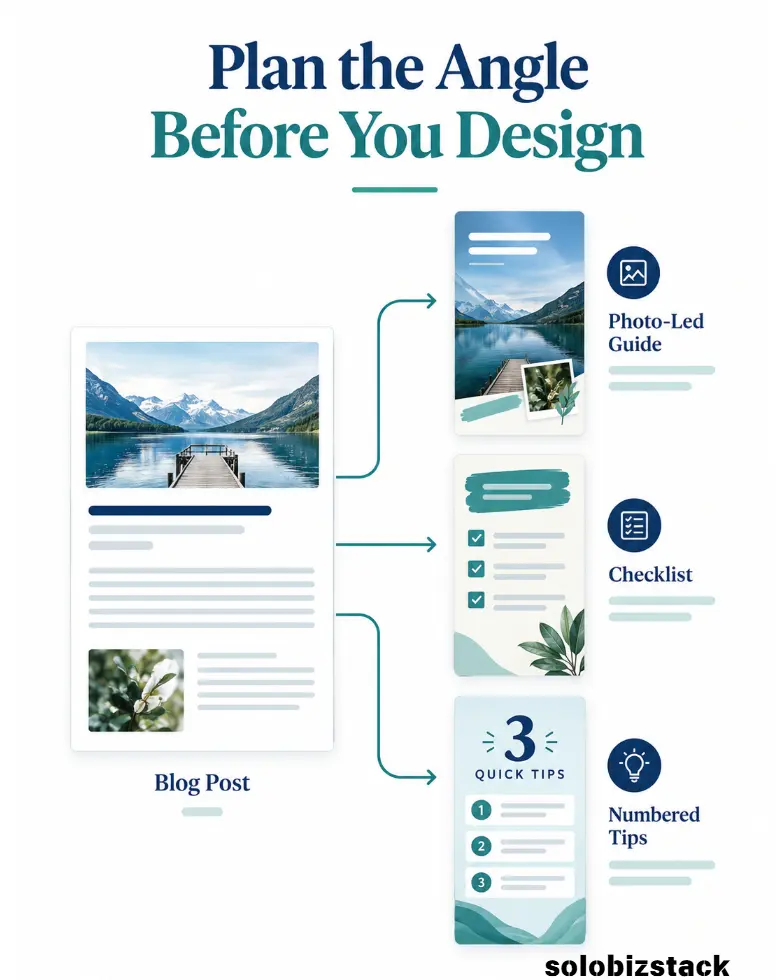
These are concept examples, not a requirement to publish all five at once.
For your first attempt, start with two or three genuinely different designs. Each should have a clear purpose and a reason for someone to notice it.
Avoid making a large batch of near-identical Pins just by changing the background color or swapping a single word. Pinterest’s guidance warns against repeatedly uploading duplicate Pins or repeatedly saving the same Pin. Create fresh, meaningful variations instead.
Step 4: Choose a Pinterest-Friendly Design Size
For standard Pinterest image creative, Pinterest recommends a vertical 2:3 aspect ratio. A common working size is 1000 × 1500 pixels. You can use this as the starting size for a Canva template and check Pinterest’s current specifications before producing other formats.
A vertical layout gives you room for a headline, a main image, and a short supporting message. But more space doesn’t mean you need to fill every part of the design.

For a simple blog Pin, aim for:
- One clear headline.
- One relevant main visual.
- A short supporting phrase, if it adds value.
- Consistent branding.
- Enough empty space for the design to breathe.
Design for people viewing the Pin on a phone. If the headline is difficult to read at a small size, simplify it rather than shrinking the font.
For current format details, see Pinterest’s official Pin specifications.
Step 5: Build a Simple Canva Template
Canva makes it easier to repeat a design process without building every Pin from a blank page.
Create one master template at 1000 × 1500 pixels. Choose a headline style, a color palette, the position of your website name, and the general layout of your visuals.
For SoloBizStack, a simple structure could look like this:
Top: A clear headline explaining what the Pin offers.
Middle: A photo, a relevant screenshot, or a simple illustration.
Lower section: One short benefit or a small supporting point.
Bottom: SoloBizStack branding in a consistent position.
You don’t have to use every section on every Pin. A checklist graphic may need more room for its key points, while a direct guide may work better with one strong headline and a single image.
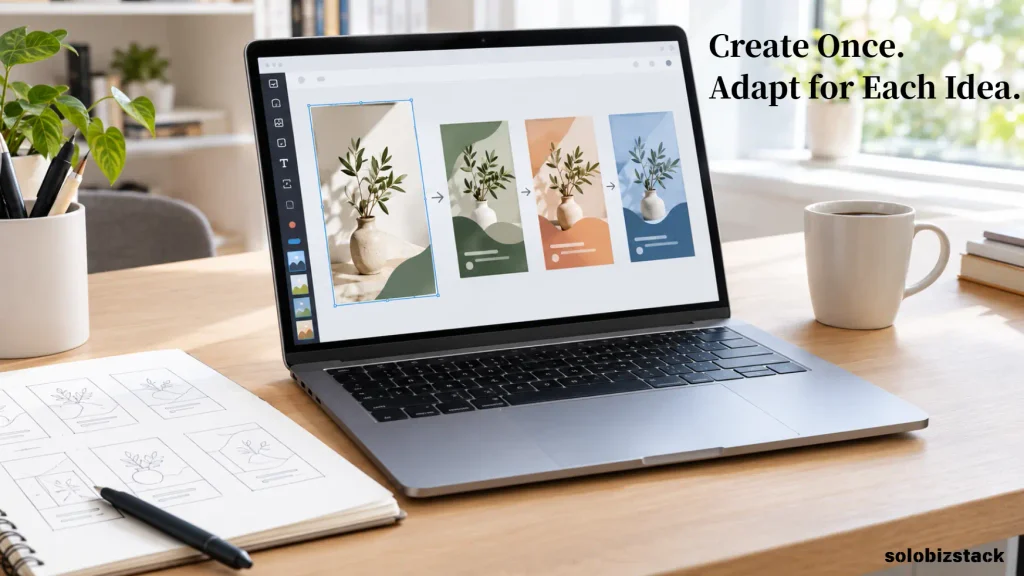
Once your template looks good on a phone, duplicate it and adapt the layout to each new Pin concept.
Use AI-generated visuals where they help
AI image tools can be useful when you need a custom visual and don’t have a suitable photo. For instance, a realistic scene of a blogger planning content may work well for a Pin about editorial calendars.
Generate the image without text whenever possible, then add the headline and brand elements in Canva. This gives you better control over spelling, font size, contrast, and spacing.
Use screenshots only when they are accurate and appropriate to share. Don’t make a generic mockup look like an authentic screenshot from a tool you haven’t actually used.
Step 6: Turn the Article Into Different Visual Formats
Not every Pin needs to be a photograph with a headline. Choose a visual format that suits the information you’re communicating.
Use a checklist for actionable content
A checklist works well for setup guides, publishing processes, and routine tasks.
For example, a Pin based on a blog publishing checklist might show:
- Check the headline.
- Add relevant internal links.
- Review images and ALT text.
- Test the page on mobile.
Keep the list short enough to read. Readers who need the full process can click through to the article.
Use a simple diagram for a process
If your article explains a workflow, show the stages visually.
For example:
Blog Post → Pin Design → Pinterest Search → Website Visit
This makes a multi-step process easier to understand at a glance. The article can explain what to do at each stage.
Use a comparison layout for decision-making content
If the article compares several tools or methods, one Pin could highlight the central difference between two options. Keep the information accurate and avoid squeezing a large comparison table into a small image.
Use a realistic image for a tutorial
A relevant laptop, workspace, or design scene can make a tutorial feel more concrete. Choose visuals that support the subject rather than simply filling space.
The key is to match the design to the purpose of the Pin. A checklist should look like a checklist, and a tutorial should make the topic clear.
Step 7: Write a Strong Pin Headline
Your blog title and Pin headline can be similar, but they don’t have to be identical. The goal is to express the same underlying promise in a way that makes sense on a visual platform.
Compare these examples:
Too vague: Blogging Tips
More specific: How to Repurpose Blog Content Into Pinterest Pins
Too broad: Grow Your Website
More actionable: Turn One Blog Post Into 3 Fresh Pinterest Pins
The stronger examples explain the topic or benefit more clearly.
Before finalizing a headline, ask yourself:
- Can someone understand the topic in a glance?
- Does it match the linked article?
- Is the benefit specific enough to be useful?
- Is the wording honest about what the reader will learn?
Avoid promising guaranteed traffic or instant growth. A Pin should be compelling without exaggerating what the article can deliver.
Step 8: Write the Pin Title and Description
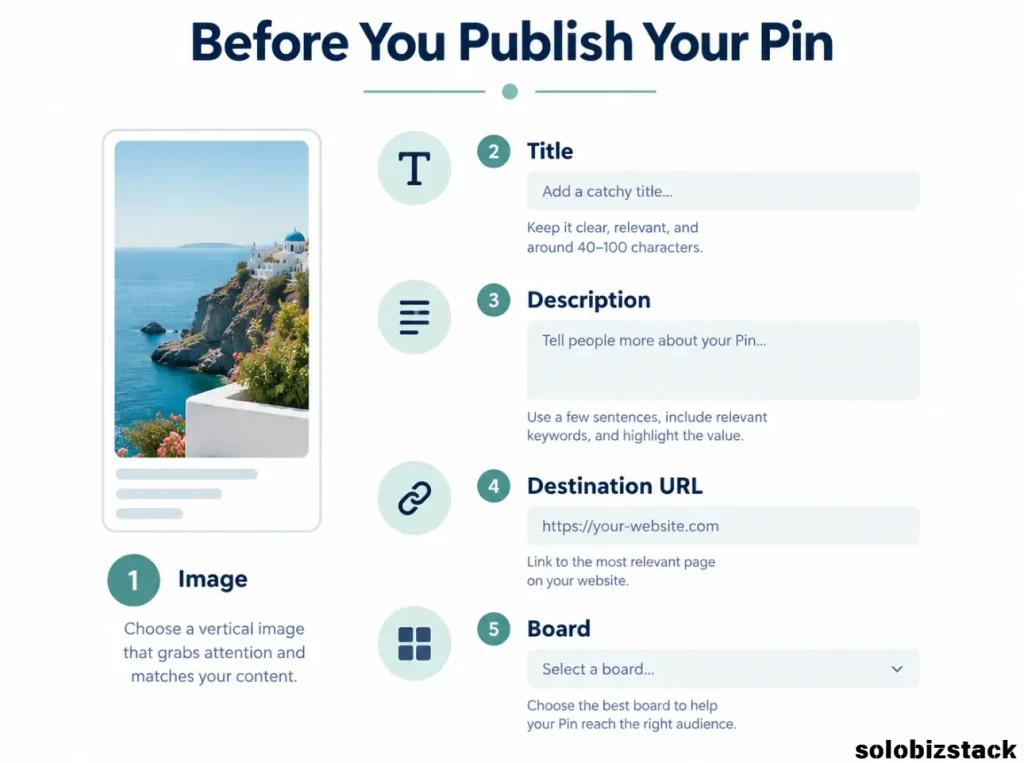
The words on the image are only one part of your Pin. Pinterest also lets you add a Pin title, description, destination URL, board, and related topics where available.
Use the title to name the topic clearly. Use the description to give a little more context, explain who the resource is for, and include relevant terms naturally.
Example: A Pin for this article
Text on the image:
Turn One Blog Post Into Pinterest Pins
Pin title:
How to Repurpose Blog Content Into Pinterest Pins
Pin description:
Learn how to turn one blog post into several Pinterest Pins with different headlines and visual angles. This beginner-friendly guide covers content selection, Canva design, Pin descriptions, and ways to track results.
Destination URL:
The URL of this article on SoloBizStack.
This description explains what the reader will find without repeating the same keyword over and over. Pinterest recommends adding relevant context to Pin titles and descriptions and linking Pins to useful destinations.
You can find more information in Pinterest’s official guide to creating Pins.
Step 9: Link Each Pin to the Right Article
The destination URL is one of the easiest details to get wrong.
If your Pin promises a Pinterest design tutorial, send readers to the tutorial—not to your homepage or an unrelated product page.
Before publishing, open the URL and check that:
- The correct page loads.
- The page works on mobile.
- The Pin headline accurately reflects the article.
- The page provides the information the Pin promised.
- Any tracking parameters are correct, if you use them.
For a blog-focused Pinterest strategy, your Pins will usually be most helpful when they direct people to a relevant article on your website.
If you use UTM parameters to track campaign visits in analytics tools, keep naming conventions consistent so you can compare performance later. UTM tracking is optional; the important thing is to use the correct destination and avoid broken links.
Step 10: Save the Pin to a Relevant Board
Choose a board that matches the subject. A Pin about content planning belongs on a board about blogging or content marketing, while a Pin about WordPress setup fits better with a board focused on WordPress or website building.
Use descriptive board names and write descriptions that accurately explain the content people will find there.
If Pinterest offers related topic tags during the publishing process, select only the topics that genuinely describe your Pin. Relevance is more useful than filling every available field with unrelated terms.
The goal is to help people understand what your Pin is about and give them a suitable way to discover related content.
Step 11: Publish Fresh Variations Without Spamming
Repurposing works best when you create different entry points to the same useful resource, not when you flood Pinterest with copies.
A practical starting point is to create two or three distinct Pin concepts for an important blog article. You can publish them over time and observe which angle resonates with your audience.
Meaningful differences might include:
- A direct tutorial headline versus a checklist.
- A photo-led design versus a simple infographic.
- A broad guide versus one specific lesson from the article.
- A problem-focused headline versus a straightforward description.
Avoid repeatedly posting the same image or creating dozens of almost identical graphics. Pinterest’s official distribution guidance recommends original, high-quality Pins and cautions against duplicate content practices that may be treated as spam.
A steady, manageable routine is better than creating a large batch you can’t maintain.
Step 12: Add Pinterest to Your Regular Blog Workflow
The easiest time to repurpose an article is when you already understand its content—often shortly after publication or during a planned content update.
Add a few steps to your publishing checklist:
- Finish the blog article and verify its links.
- Identify two or three useful Pin angles.
- Design the images using your Canva template.
- Write each Pin title and description.
- Add the correct destination URL and board.
- Publish or schedule the Pins.
- Record the URL and date in your content planning sheet.
- Review the results later.
You don’t need a complicated system. A spreadsheet with columns for the article title, Pin concept, image filename, publication date, board, destination URL, and results can be enough for a solo blogger.
For the broader Pinterest process, read our guide to How to Create Pinterest Pins for Your Blog.
[Learn How to Drive Blog Traffic With Pinterest →]
Step 13: Track Which Pins Bring People to Your Website
Don’t judge a Pin only by how attractive it looks. You also need to understand how people interact with it.
Pinterest Analytics provides metrics such as impressions, saves, Pin clicks, and outbound clicks. These measure different things:
- Impressions: How often the Pin was shown.
- Saves: How often people saved the Pin.
- Pin clicks: How often people opened the Pin.
- Outbound clicks: How often people clicked through to its destination.
If a Pin has many impressions but few outbound clicks, review whether the headline and destination promise are clear. If people save a Pin but don’t visit the page, consider whether the image is useful as a standalone reference or whether the reason to click needs to be clearer.
If a particular headline or format attracts relevant clicks, try a genuinely different version that builds on that lesson. Don’t assume that one successful Pin guarantees every variation will perform the same way.

For definitions of the available metrics, see Pinterest’s official Analytics guide.
New accounts and new Pins may have limited data. Review patterns over time instead of making decisions based on one day of activity.
Step 14: Be Careful With Affiliate Content
Some blog posts include affiliate links, and Pinterest allows affiliate content subject to its commercial and affiliate guidelines. That does not mean every Pin should be a direct affiliate promotion.
For SoloBizStack, a natural approach is to create a helpful Pin for a relevant article first. That article can explain the tool or service, discuss its strengths and limitations, and include appropriate affiliate links when they genuinely help the reader.
If you create a Pin that includes affiliate links directly, make the commercial nature of the content clear and follow the program’s terms and Pinterest’s current policies. Pinterest also cautions against repetitive or excessive affiliate Pins and requires affiliate content to be original and useful.
Read Pinterest’s Commercial and Branded Content Guidelines before building an affiliate-heavy workflow. Rules can change, so check the current policy rather than relying on an old tutorial.
A Practical Example: Repurpose One Blog Post Into Three Pins
Let’s say you have a published guide called How to Create Pinterest Pins for Your Blog.
Instead of creating one graphic and stopping there, use the article to build three different concepts.
Pin 1: The Direct Guide
Headline: How to Create Pinterest Pins for Your Blog
Visual: A laptop showing a generic Pin design beside a notebook.
Purpose: Reach readers who are specifically looking for a beginner’s guide.
Pin 2: The Checklist
Headline: Pinterest Pin Checklist for Bloggers
Visual: A clean checklist with a few items: strong headline, readable image, relevant title, correct link, and board.
Purpose: Offer a quick reference people may want to save.
Pin 3: The Time-Saving Angle
Headline: Create Multiple Pins From One Blog Post
Visual: One blog article card connected to three different Pin mockups.
Purpose: Appeal to bloggers who need a repeatable content promotion workflow.
All three Pins can lead to the same article, but each provides a different reason to click. Make the designs meaningfully distinct and ensure the destination article supports the headline.
This is the basic idea behind repurposing: the article stays the same, while the way you introduce it changes to suit different reader needs.
Common Mistakes to Avoid
Changing Only the Background Color
A new color doesn’t necessarily make a new Pin useful. Change the angle, headline, visual, or format so the variation offers a different entry point.
Putting the Entire Article on the Image
A Pin is not a miniature blog post. Select one idea and leave the detailed explanation for the linked page.
Using a Clickbait Headline
A headline may attract attention but disappoint readers if the linked article doesn’t deliver. Make the promise specific and accurate.
Sending Every Pin to the Homepage
Choose the page that best matches the Pin’s topic. The shorter journey makes it easier for readers to find the information they came for.
Ignoring Mobile Readability
If the text is hard to read on a phone, simplify the design. A clear headline and relevant visual are more useful than a crowded graphic.
Publishing Without Reviewing Analytics
Save enough information about the Pin to understand what it promoted. Review performance periodically and use the evidence to decide what to try next.
Frequently Asked Questions
How many Pinterest Pins can I create from one blog post?
There isn’t a fixed number you need to follow. Two or three distinct variations are a reasonable starting point for an important article. Add more when you have genuinely different ideas to communicate, not simply to increase your publishing volume.
Should every Pin look different if it links to the same blog post?
The designs don’t have to be completely unrelated, but they should offer a meaningful variation. Different headlines, layouts, visuals, or content angles can help you test what readers find useful. Avoid repeatedly posting nearly identical Pins.
What size should I use when repurposing blog content into Pinterest Pins?
Pinterest recommends a 2:3 vertical aspect ratio for standard image creative. A common working canvas is 1000 × 1500 pixels. Check Pinterest’s current specifications before creating other formats.
Can I use Canva to repurpose blog content?
Yes. Canva lets you build a reusable Pin template, duplicate designs, add text overlays, and export images. The time-saving part is having a consistent starting layout and adapting it to the specific idea you’re promoting.
Do Pinterest Pins bring traffic to a blog?
They can, but results vary by topic, design, audience, destination, and other factors. Use relevant titles and descriptions, link each Pin to the page it describes, and review outbound clicks to see whether the strategy is bringing people to your site.
Should I link Pins to my blog or directly to an affiliate product?
That depends on the purpose of the Pin and the applicable policies. For a content-focused website, a useful article is often a natural destination because it provides context before recommending a product. Direct affiliate promotion requires transparency and compliance with Pinterest’s current affiliate guidelines and the program’s terms.
Final Thoughts
Repurposing blog content for Pinterest doesn’t need to become another full-time job. Start with one useful article, identify a few ideas inside it, and turn those ideas into distinct Pins using a simple design template.
Give each Pin one clear message, write an accurate title and description, choose a relevant board, and link to the page that delivers what you promised. Then review the results and use what you learn to improve your next batch.
The goal isn’t to publish the largest number of Pins. It’s to make more of your existing content discoverable in ways that are useful to the people you want to reach.