How to Speed Up a WordPress Website: 12 Practical Fixes (2026)
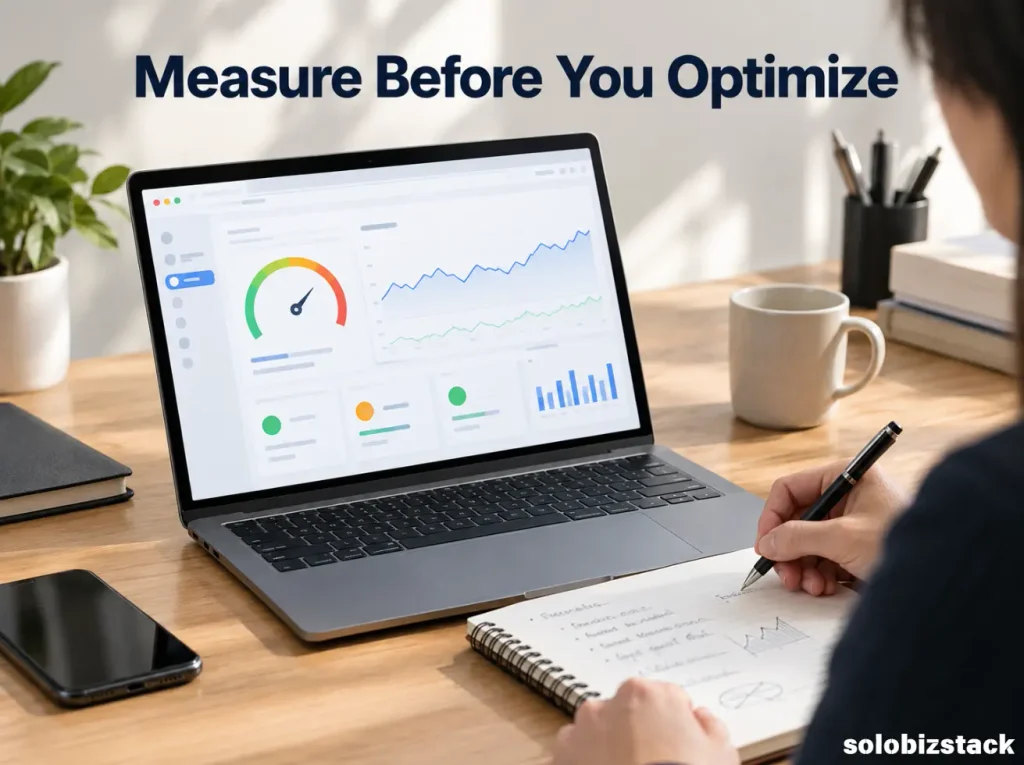
If you want to know how to speed up a WordPress website, start by measuring its current performance before installing another plugin or changing your theme.
A slow website can frustrate visitors, make pages feel difficult to use, and delay important content from appearing on screen. For a blog or small business website, that matters because visitors need to read articles, navigate between pages, use forms, and find information without unnecessary waiting.
The good news is that you do not need to be a developer to improve many common WordPress performance problems. Image optimization, caching, a suitable hosting setup, and fewer unnecessary scripts can make a meaningful difference.
This guide explains how to speed up a WordPress website step by step, including what to check first, which tools can help, and how to avoid changes that accidentally break your site.
Affiliate Disclosure: This article may contain affiliate links. If you purchase through one of our links, SoloBizStack may earn a commission at no additional cost to you.
How to Speed Up a WordPress Website: Start With These Fixes
If you want a quick starting point, work through these tasks in order:
- Measure your current performance.
- Check your hosting and server setup.
- Optimize large images.
- Enable an appropriate caching solution.
- Review your theme and plugins.
- Reduce unnecessary CSS, JavaScript, and third-party scripts.
- Test the changes on mobile and desktop.
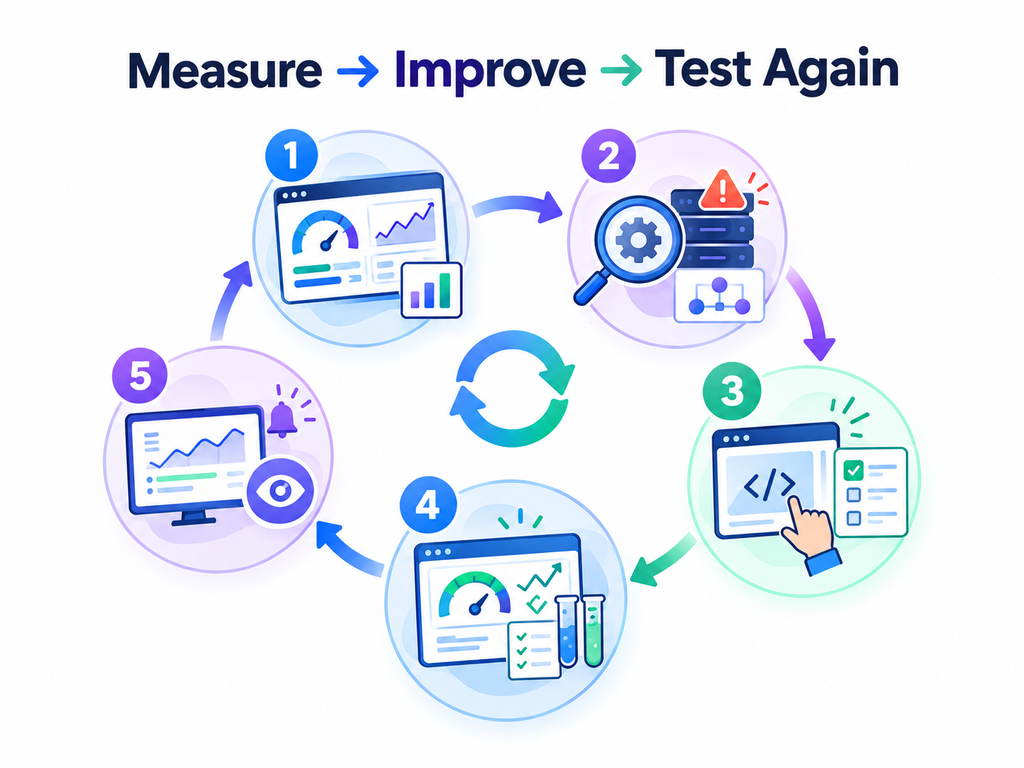
Do not make all these changes at once. Test the site, make one meaningful change, then test again. This helps you understand what actually improves performance and makes problems easier to troubleshoot.
Step 1: Test Your WordPress Website Speed
Before changing anything, get a baseline measurement.
Open Google PageSpeed Insights and enter your homepage URL. Then test one representative blog post or important landing page.
Review both mobile and desktop results. Mobile deserves particular attention because visitors may use slower connections and less powerful devices than your own computer.
PageSpeed Insights shows two types of information:
Lab data comes from a simulated test and is useful for diagnosing specific problems.
Field data comes from real users when enough data is available. It helps you understand how people actually experience your site.
A new website may not have enough real-user data for every page. In that case, use the available lab diagnostics to identify possible improvements, but do not assume a single test score represents everyone’s experience.
For details, see Google’s PageSpeed Insights documentation.
What Should You Look at in the Report?
Start with the issues that affect the visitor most.
| Metric | What it tells you | What to investigate |
|---|---|---|
| Largest Contentful Paint (LCP) | How quickly the main visible content loads | Large hero images, server response, render-blocking resources |
| Interaction to Next Paint (INP) | How responsive the page feels during interactions | Heavy JavaScript, excessive scripts, slow event handling |
| Cumulative Layout Shift (CLS) | Whether page elements unexpectedly move | Images without reserved space, late-loading ads, layout changes |
Google’s current recommended “good” Core Web Vitals thresholds are LCP of 2.5 seconds or less, INP of 200 milliseconds or less, and CLS of 0.1 or less. These are evaluated at the 75th percentile of page visits, not by demanding that every individual visit has the same result. (Core Web Vitals)
Do not try to improve every warning simply because it appears in the report. Prioritize changes that address an actual bottleneck and preserve a good user experience.
Step 2: Check Your Hosting Before Installing More Plugins
A WordPress website runs on a server. If the hosting environment responds slowly or struggles under load, plugin settings alone may not solve the problem.
Your hosting provider can affect server response time, available resources, caching options, and how reliably the site handles traffic.
If your website is consistently slow, check:
- Whether your hosting plan meets your site’s current needs
- Whether server-side caching is available
- Whether your PHP and database versions are supported and up to date
- Whether your site experiences resource limits or server errors
- Whether your hosting dashboard already provides performance tools
You do not need the most expensive hosting plan just because you want a fast website. First check whether your current plan is configured correctly and whether the performance problems originate from the server or from your pages.
For SoloBizStack, which uses WordPress and Kadence, I would begin by checking the host’s recommended caching and optimization settings before adding another performance plugin.
[Compare Hosting Options for Beginners →]
[Explore WordPress Hosting Options →]
Step 3: Use a Lightweight Theme and Review Your Page Layout
Your theme affects how your website presents content and which styles, scripts, and layout components may be loaded.
A theme with lots of animations, large sliders, complicated visual effects, or features you do not use may introduce unnecessary work. A simpler design often gives you an easier starting point for performance optimization.
Kadence can be a practical option for building WordPress pages without requiring a complicated stack of additional tools. However, no theme automatically makes every website fast. The way you build each page also matters.
For example, a simple article page with readable text and a few optimized images may be much easier to load than a page containing multiple sliders, animated sections, videos, and external widgets.
Review your homepage and several important articles. Ask yourself:
- Does this section help visitors?
- Is this animation really necessary?
- Am I loading a carousel that nobody uses?
- Can a complicated layout be replaced with a simpler one?
Remove decorative elements that do not serve a clear purpose. Keep the parts that make the website useful and recognizable.
[Compare Kadence and Elementor →]
Step 4: Optimize Images Before Uploading Them
Large images are a common source of unnecessary page weight, especially on content websites with featured images, screenshots, diagrams, and Pinterest graphics.
If you upload a full-resolution image when the page only needs a smaller version, visitors may download far more data than necessary.
Resize Images to Their Display Size
Before uploading an image, consider how it will appear on the page.
A large hero image may need more pixels than a small icon, but neither should be unnecessarily oversized. Create images at appropriate dimensions for the layout instead of uploading original camera images without adjustment.
Compress Images
Image compression reduces file size. The goal is to make files smaller without introducing visible quality problems.
For most blog photographs and graphics, you can use modern formats such as WebP or AVIF when your image workflow and site setup support them.
Use a consistent process so you do not compress the same image repeatedly and degrade its quality.
Be Careful With Lazy Loading
Lazy loading can delay the download of images that are not yet visible on the screen. This is helpful for many images further down a long article.
However, do not blindly lazy-load the main hero image or another image that is responsible for the page’s LCP. A prominent image that needs to appear immediately may need to be loaded and prioritized earlier.
For SoloBizStack, this is particularly relevant because your articles contain featured images and multiple explanatory visuals. Keep images optimized, and check how the main image behaves after making changes.

Avoid Running Multiple Image Optimization Plugins
Choose one image optimization workflow. Running multiple image optimization tools on the same media library can create duplicated work or undesirable results. LiteSpeed’s documentation specifically warns against using other image optimization plugins alongside its own image optimization feature. (LiteSpeed Image Optimization)
[Learn How to Create Blog Images Without a Designer →]
Step 5: Enable Caching With the Right Solution
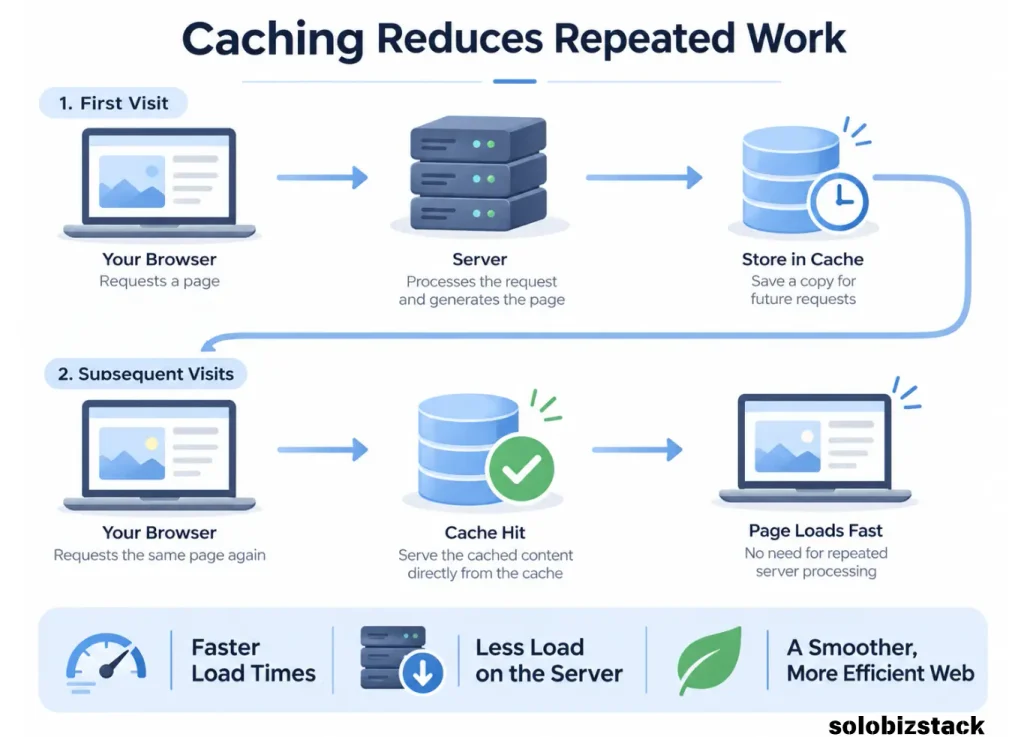
Caching helps a website serve content more efficiently by reusing previously generated results instead of repeating the same processing for every request.
WordPress supports several caching approaches, including page caching, browser caching, object caching, and server-side caching. The most suitable setup depends on the host, site features, and how much dynamic content your website contains. (WordPress Performance Optimization)
For a typical blog, page caching is often a useful place to start.
When a page can be served from a prepared cache, the server may not need to run the full WordPress page-generation process for every visitor. That can reduce server processing and improve delivery time.
Which Caching Plugin Should You Use?
The answer depends on your hosting setup.
- LiteSpeed Cache: Worth considering when your hosting environment supports its server-level caching features.
- WP Super Cache: A long-established option for page caching.
- WP Rocket: A paid performance plugin that offers caching and additional optimization features.
These are options, not a recommendation to install all of them together.
Before choosing one, check whether your host already provides page caching or recommends a specific plugin. Avoid running multiple caching plugins simultaneously unless you understand why their functions do not overlap.
Remember to Clear the Cache After Changes
After updating a page, changing CSS, or adjusting performance settings, clear the relevant cache if needed. Otherwise, you may keep seeing an older version of the page while testing.
Test the site in a private browser window and on a mobile device to make sure the updated version is actually being served.
Explore WordPress Performance Options →
If you are considering a paid caching plugin, compare its features with the tools your host already provides before purchasing.
Step 6: Reduce Unnecessary CSS and JavaScript
CSS controls how your website looks, while JavaScript adds interactive behavior. Both are useful, but unnecessary or poorly optimized files can delay page rendering and responsiveness.
Start by reviewing features that add scripts or styles, such as:
- Sliders and animation libraries
- Pop-ups and chat widgets
- Multiple page-builder add-ons
- Embedded media
- External tracking scripts
- Widgets that appear on every page but are rarely used
Remove components you genuinely do not need before trying more advanced optimization techniques.
Minification, Defer, and Delay Settings
Some performance tools can minify CSS and JavaScript or change when scripts load. These options may help, but they can also affect menus, forms, buttons, sliders, and layout behavior.
Enable one setting at a time, then retest your homepage, navigation, contact form, and important article pages.
Do not assume combining every CSS or JavaScript file is always faster. The best result depends on the files, server setup, and browser behavior. Let the performance report guide you instead of turning on every optimization switch.
Step 7: Simplify Fonts and External Resources
Fonts can affect both download size and how quickly text appears. Loading many font families, weights, and styles can increase the number of resources a browser needs to fetch.
For a content-focused site, start with a small number of font families and weights. Use the styles your design actually needs, and avoid loading decorative font variations across every page.
External resources can also introduce delays. For example, a page may load third-party scripts for analytics, social embeds, chat, advertising, or other services.
Review each external resource and ask whether it provides enough value to justify the extra work it creates.
You do not need to remove every external script. Analytics and useful integrations can support your business. The goal is to remove unnecessary requests and load the remaining resources in a way that does not interfere with the main content.
Step 8: Remove Unused Plugins and Duplicate Features
Plugins extend WordPress, but overlapping features and unnecessary code can make a site harder to maintain and diagnose.
The number of plugins alone does not determine website speed. What matters is what each plugin does, what resources it loads, and how it interacts with the rest of your website.
Review your installed plugins and ask:
- Do I still use this plugin?
- Does it provide a feature my host or theme already includes?
- Is another plugin performing the same job?
- Does it add scripts to pages where they are not needed?
- Is it maintained and compatible with my setup?
For example, you usually do not need two SEO plugins managing the same page titles and sitemaps, or multiple performance plugins providing overlapping caching features.
Before removing a plugin, confirm whether your theme or another plugin depends on it. Deactivating one can also affect how pages look or work, so test the site after changes.

[Essential WordPress Plugins for a New Website →]
Step 9: Review Videos, Embeds, and Third-Party Widgets
Large video embeds and third-party widgets can add substantial resources to a page.
If an article contains several embedded videos, consider whether every video needs to load immediately. A preview image or click-to-load approach may reduce the initial work required by the browser.
Apply the same principle to social media feeds, chat tools, maps, and other widgets. Keep useful features, but avoid loading heavy components on every page when they are only needed in a few places.
This is particularly helpful for long blog posts. Readers should be able to see the introduction and start reading without waiting for every optional widget to finish loading.
Step 10: Consider a CDN if Your Audience Is Geographically Spread Out
A content delivery network (CDN) can serve cached files through a distributed network of locations. This may reduce the distance that static assets such as images, stylesheets, and scripts need to travel to reach visitors.
A CDN can be worth considering when your audience is spread across countries or continents, or when your current setup has trouble delivering static resources efficiently.
However, it is not a substitute for fixing oversized images, inefficient page layouts, or slow server processing. A CDN will not automatically solve every WordPress performance problem.
Start with the basics. Add a CDN when it addresses a clear need, and verify that caching, HTTPS, and any required domain settings are configured correctly.
Step 11: Keep WordPress and Its Database in Good Shape
Keep WordPress core, your theme, and your plugins updated. Updates can include security fixes, bug fixes, and compatibility improvements, although not every update will make your website faster.
Make sure you have a recent backup before applying significant updates.
Database optimization can also help in some situations, particularly on sites with substantial amounts of unnecessary stored data. But for a relatively new blog, database cleanup is usually not the first thing I would investigate.
Do not run aggressive cleanup operations just because a plugin recommends them. Review what will be deleted, ensure you have a backup, and avoid removing data that the site still requires.
Step 12: Test Your Website After Every Major Change
Speed optimization is a process of measuring, adjusting, and checking the result.
After making a significant change:
- Clear the relevant caches.
- Test the same URLs you measured before.
- Compare mobile and desktop results.
- Open the site in a private browser window.
- Test forms, menus, buttons, images, and other essential functions.
- Record the result so you know which changes helped.
Do not compare unrelated pages or assume that one test represents every visit. Performance testing can vary with network conditions, cache state, and other factors.
For ongoing measurement, use PageSpeed Insights and, when data is available, the Core Web Vitals report in Google Search Console. Google’s documentation explains both lab and field measurement and the current Core Web Vitals thresholds. (PageSpeed Insights)
Common WordPress Speed Optimization Mistakes
Installing Too Many Performance Plugins
More optimization plugins do not automatically make a site faster. Choose a compatible solution and avoid overlapping settings.
Optimizing for a Score Instead of the Visitor
A high PageSpeed score can be useful, but it is not the only goal. A real visitor needs to see the main content, navigate easily, and use the site without delays or layout problems.
Compressing Images Without Checking Their Appearance
Smaller files are useful, but visibly degraded images can damage the quality of your content. Review both file size and visual clarity.
Enabling Every Advanced Setting at Once
Changing many caching and script settings together makes it difficult to identify what caused a problem. Make controlled changes and test after each one.
Ignoring Mobile Performance
A page that seems fast on your desktop may behave differently on mobile. Always compare results and test the actual mobile layout.
A Simple WordPress Speed Optimization Checklist
Use this checklist whenever you want to review your site’s performance.
- Test the homepage and one important article in PageSpeed Insights.
- Check the mobile and desktop results.
- Review hosting performance and available server-side caching.
- Resize and compress images before uploading.
- Avoid lazy-loading the main image that needs to appear immediately.
- Choose one suitable caching solution.
- Remove unnecessary page sections, scripts, and duplicate plugin features.
- Review font loading and external widgets.
- Keep WordPress, themes, and plugins updated.
- Retest the site after changes and confirm that important functions still work.
You do not have to complete every task in one day. Start with the issues that affect your most important pages and work through the checklist gradually.
Frequently Asked Questions
How can I speed up a WordPress website without coding?
Start by testing the site, optimizing images, using the caching solution recommended by your host, removing unnecessary features, and reviewing large external scripts. Many common improvements can be made through WordPress settings or plugins without editing code.
What is the best WordPress speed optimization plugin?
There is no single best plugin for every site. LiteSpeed Cache can be a good fit for compatible hosting, while other solutions may suit different environments. Check your host’s built-in caching features and choose one approach rather than installing several overlapping plugins.
Do WordPress plugins slow down a website?
Some plugins can add scripts, database work, requests, or other processing, but plugin count alone is not a reliable measure of speed. Review what each plugin does and remove unused or overlapping features rather than uninstalling plugins blindly.
Does website speed affect SEO?
Performance and Core Web Vitals are part of Google’s page experience guidance, but a fast website is not guaranteed to rank highly. Useful content, search intent, relevance, and many other factors remain important. Speed optimization should improve the experience for real visitors, not just produce a better test score.
What are good Core Web Vitals scores?
Google’s recommended good thresholds are LCP at or below 2.5 seconds, INP at or below 200 milliseconds, and CLS at or below 0.1, measured at the 75th percentile of page visits. PageSpeed Insights can help you inspect available lab and field data.
Should I use a CDN for my WordPress website?
A CDN can help deliver static assets more efficiently, particularly when visitors are spread across different regions. However, it is not always the first priority for a small website. Optimize images, caching, and unnecessary resources first, then assess whether a CDN addresses a remaining problem.
Why is my WordPress website still slow after installing a cache plugin?
Caching does not fix every bottleneck. Your site may still have oversized images, heavy scripts, inefficient layouts, slow server responses, or conflicts between optimization tools. Retest the page and use the diagnostic details to identify what remains slow.
Final Thoughts
Learning how to speed up a WordPress website does not mean installing every performance plugin or enabling every optimization option.
Start by measuring the site. Fix the biggest issues first. Optimize images, use suitable caching, simplify unnecessary resources, and check whether your hosting setup meets your needs.
Then test the result, confirm that your website still works correctly, and repeat the process when new problems appear.
For SoloBizStack, the goal is a fast, reliable website that makes it easy for readers to explore articles, compare tools, and follow useful links.
Measure first. Improve what matters. Test again.